Blog Series Overview
- Angular for beginners
- The building blocks of an Angular app
- Angular’s Data Layer
- Observables: Reactive with RxJS
- No Angular SPA without routing
Angular is designed to make web application development easy, efficient, and scalable. This is the declared goal of the framework I present in this article series. After we’ve already taken a look at the history of Angular, the creation of a project, and the basic elements of the Angular CLI in the first part, we will now take a closer look at the Angular components. We already briefly touched on these in Part 1, but these important building blocks in Angular applications have a lot more to offer.
We already know that an Angular component always includes exactly three different files: A TypeScript file, an HTML file, and a styling file. This does not include the component.spec.ts file, which contains the component tests. We will now learn several ways to connect our TypeScript code to the template. For example, we can dynamically change the styling of a component or the displayed text for a user interaction with very little effort. After that, we will create more components to handle the question of how we exchange data between them.
Finally, we will get to know another very useful building block: the Angular Pipe. Angular already provides some built-in variants, but we will also implement our own version here.
Template syntax
Having already learned the basics of a component in the previous article, we will now dive deeper into different template notations. The three component types are:
- an HTML file, the template,
- a TypeScript file, the controller code of the component, and
- a stylesheet file for styling the HTML.
Here, Angular offers functionality to extend the familiar HTML elements. This allows us to use dynamic features directly in HTML. For example, we can respond to a user interaction.
Interpolation
First, let’s look at how we can bind data to our AppComponent template using something called interpolation. To do this, first, we will create a variable in our app.component.ts (Listing 1).
import { Component } from '@angular/core';

@Component({
  selector: 'app-root',
  templateUrl: './app.component.html',
  styleUrls: ['./app.component.scss']
})
export class AppComponent {
  title = 'Angular Application';
}
Now we change to our associated template file app.component.html and add the following line:
<pre>><h1>My first {{ title }}</h1></pre>
After recompiling and launching the application with ng serve, we see that after launching the application in our browser, the text that’s been defined in the TypeScript code is also rendered.
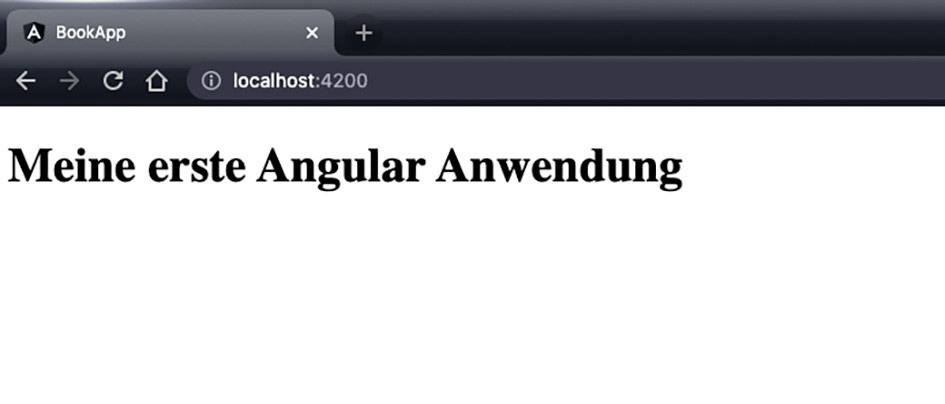
Fig. 4: Project structure of our application
Let’s take another look at the HTML file: Using the double curly braces, we can bind data that we define in our controller file to our template. A template expression is specified between the brackets. This expression always refers directly to the associated component class (here, app.component.ts). But how does our rendered HTML behave if we assign a different value to the title variable after some time? This can be easily tested with the browser’s setTimeout function, as seen in Listing 2.
import { Component } from '@angular/core';
@Component({
...
})
export class AppComponent {
title = 'Angular Application';
constructor() {
setTimeout(() =&amp;amp;amp;amp;amp;amp;gt; {
this.title = 'successful change'
}, 3000)
}
}
Here, our variable receives a new value after 3,000 milliseconds have elapsed. After restarting the application, the old text still appears for the time being. The new text is rendered once three seconds expire (Fig. 2).

Property Binding
With Property Bindings, we will learn another form of template syntax, which we can also use to dynamically change data of a DOM element like an HTML attribute. HTML attributes are additional values that influence the behavior of an HTML element or even fundamentally change its appearance. Every HTML element has standard attributes like id, class, name, style. But there are also specific attributes that apply only to a set of HTML elements, for example, the href attribute of an <a> tag. A complete overview of all HTML attributes can be found at [1].
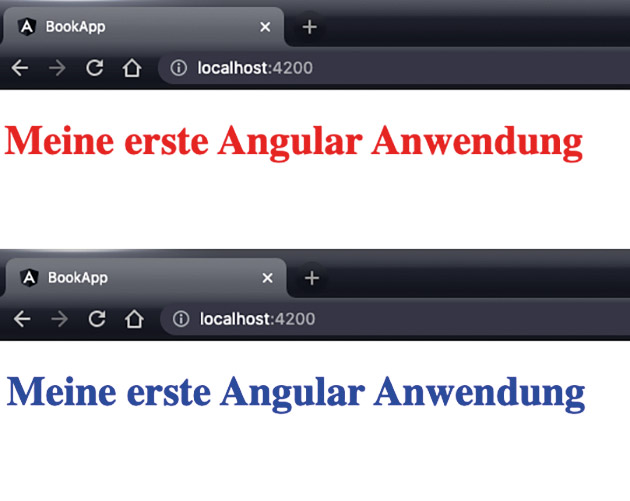
It is often necessary to change the styling of an HTML element after a user interaction, for instance. We can implement this very easily. First, we create two different classes in our app.component.scss file (Listing 3).
.red {
  color: red;
}

.blue {
  color: blue;
}
We want to first assign the CSS class red and then dynamically at runtime assign the CSS class blue to our existing
< h1 > tags. For this, we will create another variable in our AppComponent, as seen in Listing 4.
@Component({
  ...
})
export class AppComponent {
  title = 'Angular Application';
  cssClass = 'red';
  ...
}
We will now bind this variable to our template using Property Binding:
&amp;amp;lt;span style="font-weight: 400;"&amp;amp;gt;&amp;amp;lt;h1 [class]="cssClass"&amp;amp;gt;My first {{ title }}&amp;amp;lt;/h1&amp;amp;gt;&amp;amp;lt;/span&amp;amp;gt;
As we can see, HTML attribute binding is done using two square brackets enclosing the attribute name. This allows the Angular compiler to recognize that cssClass must be a variable belonging to TypeScript.
For our final step, we want to simulate a user interaction to test whether the rendered text’s color changes accordingly when we assign the value blue to the variable cssClass at runtime. Again, this is very easy with a setTimeout function like the one in Listing 5.
...
constructor() {
setTimeout(() =&amp;amp;gt; {
this.cssClass = 'blue'
}, 3000)
...
}
If we run this code in our web browser, we receive the following scenario: After exactly three seconds, the new CSS class is set and the text is rendered in blue again (Fig. 3).
In this example, we see how to bind variables with HTML attributes. Property binding works with any existing HTML attribute. Later we will learn how to implement custom properties for our component.
Any change in our TypeScript code’s data causes the associated template to be re-rendered as well. This is based on complex algorithms and calculations in the Angular framework, which automatically detects when data has changed over the lifetime of a component. Angular marks a component as dirty and triggers a change detection cycle [2]. This is responsible for analyzing changes to the data and recognizing which data is bound to the template in order to re-render the corresponding HTML as a result.
In fact, it isn’t easy to keep the template in sync with the TypeScript code and make the displayed template content correspond with the data. People tend to want to intervene in HTML rendering, even with the help of the native DOM API, as seen here:
document.getElementById('header').innerHTML = '&amp;amp;lt;h1&amp;amp;gt;New Title&amp;amp;lt;/h1&amp;amp;gt;';
Even if this seems faster at first, or if it’s a familiar method, this call to the native browser DOM API leverages all Angular mechanisms that make it possible to keep template and TypeScript code in sync. Therefore, this is considered bad practice and should be avoided. Another point to keep in mind when using template syntax is to call functions directly within the interpolation or property bindings, as seen here:
&amp;amp;lt;h1 [class]="getClass()"&amp;amp;gt;My first {{ getTitle() }}&amp;amp;lt;/h1&amp;amp;gt;
As mentioned previously, Angular components are marked as dirty as soon as the value of a variable has changed. Subsequently, these components are examined for all their data bindings to the template to find out which HTML needs to be re-rendered. The function that’s directly bound to the template would be executed every time. If this is also a complex calculation logic within the function, then we can expect this binding to have a negative impact on the component’s rendering performance. Therefore, the best practice is to only bind the component properties to the template.
Event Binding
The third template syntax I’d like to introduce is event binding. It allows us to react to events that can occur within a component. These events can be triggered by native DOM elements. Typical events are Click, KeyUp, KeyDown, and MouseOver events [3]. Even custom events can be triggered within an included component, but we’ll get to that later. As an example, we will now bind a simple click event to our component. For this, we will first create a function that should be executed as soon as the click event is triggered (Listing 6).
@Component({...})
export class AppComponent {
  ...
  clickHandler() {
    console.log('I’ve been clicked!');
  }
  ...
}
We can now link this function to our template using Event Binding:
&amp;amp;lt;button (click)="clickHandler()"&amp;amp;gt;Click me&amp;amp;lt;/button&amp;amp;gt;
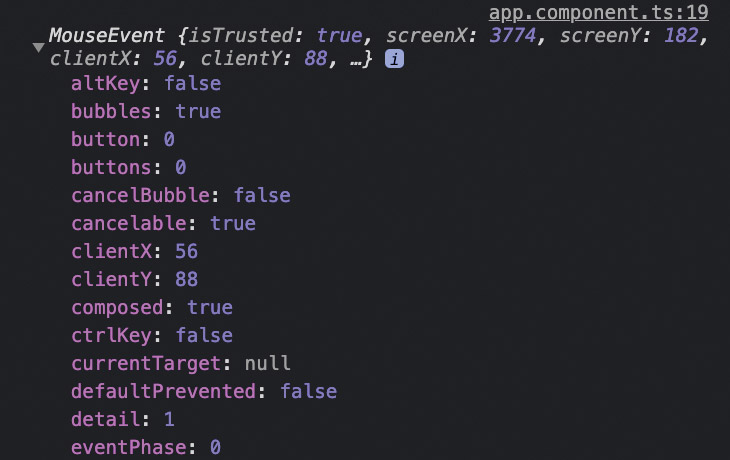
As you see, the binding is done with a specific event using two round brackets. As soon as the user clicks this button, our clickHandler function is executed. Another feature Angular provides in the course of event binding is easy access to event data. By handing over the $event keyword within the template to our function, this data can be evaluated within the component (Fig. 4).
&amp;amp;lt;button (click)="clickHandler($event)"&amp;amp;gt;Click me&amp;amp;lt;/button&amp;amp;gt;
This will be especially important later on when we trigger events within a component. Now that we’ve covered the most important basics of an Angular component, let’s move on to developing our application.
Extending our book app
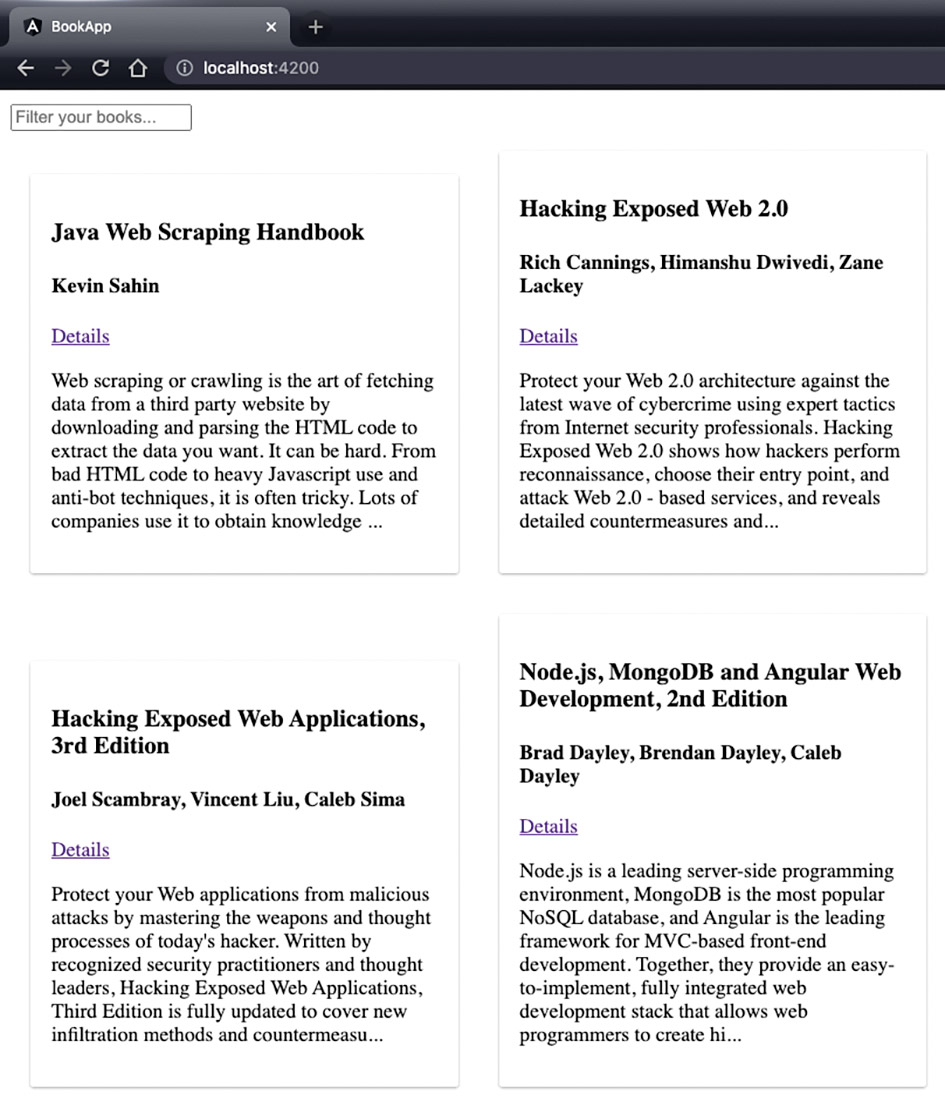
The goal of this article series is to develop an application that allows us to view books, edit them, and even create new ones – essentially, book management software. In this article, we will focus on displaying and filtering books. For this, we will extend our Book app from Part 1. We will create new components and fill them with functionality by using the template syntax that we just introduced. At the end of this article, our application should look like Figure 5.
For the implementation of this feature, we will create the BookModule:
&amp;gt; ng generate module book
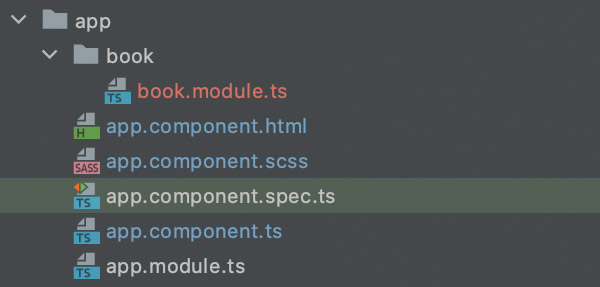
As we learned in the first article, Angular modules are used to split up our code in a domain-specific way. Basic modules that are repeatedly included in components can be swapped out into a common SharedModule, which can then be imported into corresponding feature modules. The Angular team has defined official categories of Angular modules [4]. After creating the new module, we receive the folder structure in Figure 6.
For implementing a list of data to be displayed, a common pattern in the Angular world is to implement two components: a smart component for managing all the data, and a dumb component for simply displaying a list item. The latter will be added several times to the management component. Now we will add two components to our BookModule:
- BookComponent: contains the control for filtering and serves as a container of several books
- BookCardComponent: a simple component that is only used to display a single book
In doing so, we execute the following commands using the Angular CLI:
&gt; ng generate component book/book &gt; ng generate component book/book-card
Now, if we look at our book.module.ts file, it looks like the one shown in Listing 7.
@NgModule({
  declarations: [
    BookComponent,
    BookCardComponent
  ],
  imports: [
    CommonModule
  ]
})
export class BookModule { }
In order for our books to be displayed, we must also include the BookComponent in our AppComponent. The BookComponent is located outside the module scope of the AppComponent and we have to make it known explicitly. We can do this in just a few steps: First, we need to export the BookComponent inside the BookModule (Listing 8) and then import the entire BookModule into our AppModule. Now we can use the component selector to insert our BookComponent into the AppComponent template.
@NgModule({
  ..
  exports: [
    BookComponent
  ]
})
export class BookModule { }
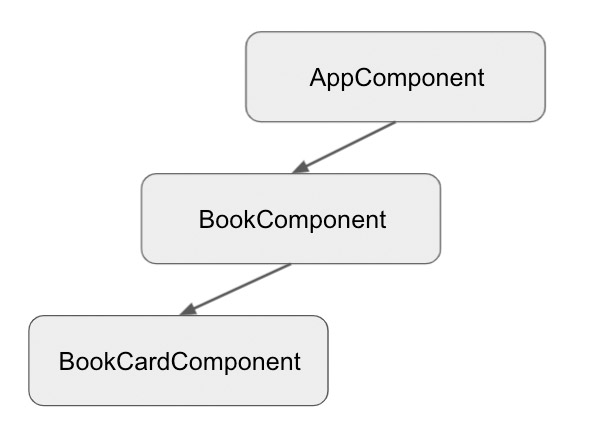
For our last step, we will integrate our BookCardComponent into our BookCardComponent. In the course of this project, we will integrate several of these components, since we want to display several books. However, we are still missing this data. This way, we can nest components as deeply as we like. The components of our application reference each other and form a tree structure (also called a component tree). The current tree structure of our application corresponds to Figure 7.
Communication between components
After we have structured our application cleanly, the components must be able to communicate with each other. To make this possible, we will now dive deeper into the incoming data flow of a component. We’ve already learned everything we need for this: using property binding, we can give data from outside (from the parent component) into our child component. This is how it works: The child component offers us a custom property as an HTML attribute, which we can set with Property Binding in the parent component. Within the child component, we read the data of our offered property. We can see how to offer a property within a component in Listing 9.
import { Component, Input } from '@angular/core';

@Component({
  ...
})
export class BookCardComponent {
  @Input() bookEntry: Book;
}
First, we import the decorator Input() and assign it to our property bookEntry. Because of type safety, we define an additional data type Book and assign it to the property:
export interface Book {
  title: string;
  author: string;
}
Finally, we bind this property with interpolation to the associated template. This will show us the books’ data once we receive it from our parent component. Our long-term goal will be to get this data via a backend service in our parent component, but this is not available yet. Therefore, we will first create dummy data in our BookComponent:
book = { title:'Moby Dick', author: 'Herman Melville'}
and give it using Property Binding:
&lt;app-book-card [bookEntry]="book"&gt;&lt;/app-book-card&gt;
Having learned that we can use Property Binding to pass data from the parent component to one of its child components, we can now address data flow in the opposite direction: sending data from the child components to their corresponding parent component.
The basic principle is based on custom events that we will create and trigger within the child component. Here, I will pass the data inside the event. In the parent component, we will use event bindings to bind a function to the corresponding event. Let’s start again with the implementation of the child component, as shown in Listing 10:
import { Component, EventEmitter, Input, Output }
...
@Component({
...
})
export class BookCardComponent {
@Input() bookEntry: Book;
@Output() ping = new EventEmitter&lt;Book&gt;();
sendToParent() {
this.ping.emit(this.bookEntry);
}
}
The Input() decorator has a matching counterpart, the Output() decorator. With this, we provide our new property of the component: ping. This property now serves as a custom event, which we need to trigger in the next step. This is supported by Angular’s EventEmitter, which we also type with our Book interface. It provides us with the emit function to trigger our event. Additionally, now we give the item that we want to send to our parent component.
If we now switch to the BookComponent, we can bind to the ping event in the corresponding template. Here, $event contains the corresponding book object that we sent along as event data:
<app-book-card
  (ping)="handlePing($event)"
  [bookEntry]="book">
</app-book-card>
Structural directives
Structural directives allow us to dynamically add or remove DOM elements at runtime, changing the document’s structure. This can be especially useful if we want to display a message only when an error occurs, for example. The most popular structural directives are ngIf and ngFor. We will now take a closer look at these and include them directly in our BookComponent. The ngIf directive only inserts a DOM element when a user-defined condition is met:
<div *ngIf="hasError">An error occurred during loading</div>
Another example of a use case for ngIf is if a component is not rendered until all data given to it via property binding is filled with content. However, we are now incorporating ngFor into our BookComponent. With ngFor we can iterate over an array and create a DOM element for each item:
<ol *ngFor="let category of bookCategories">
  <li> {{ category }} </li>
</ol>
As an output, we receive a list with all book categories. This is exactly the feature we need to display our book list:
<ol>
  <li> Horror </li>
  <li> Fantasy </li>
  <li> Drama </li>
</ol>
Now, back to our BookCardComponent: Currently, we only keep one book in a property there. But with these newly learned features, we can make further adjustments in our template to bind an entire array full of books to it. First, we create this array as a property in the component class:
books = [{ title:'Moby Dick', author: 'Herman Melville'}, {...}, {...}]
Then, we want to join this array using the ngFor directive:
<app-book-card
  *ngFor="let book of books"
         (ping)="handlePing($event)"
         [bookEntry]="book">
</app-book-card>
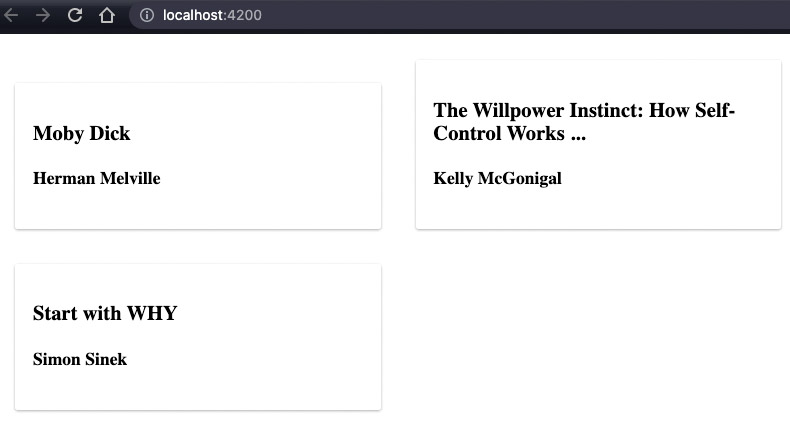
Let’s take another look at our result in the browser. All of the books we defined in our array are now rendered inside the BookCardComponent. Figure 8 represents the new component tree. Now, we’re only missing one thing: the ability to filer by books.
Pipes
Pipes are used in Angular to transform data for display. They are mainly used within the template of a component. A pipe is introduced with the pipe symbol. Behind it is a function that transforms the input value into a user-defined logic and returns it again. Angular offers some predefined built-in pipes [5], such as the date pipe:
<h1>{{ birthday | date }}</h1>
The date pipe expects a JavaScript date object as input, usually, a string formatted according to ISO 8601. This object is transformed into a different date format by the pipe. What this format should look like can be given to the pipe in the form of further parameters.
<h1>{{ birthday | date:'shortDate' }}</h1>
The parameter shortDate [6] transforms the date to the following string: 14.11.21.
Angular pipes are an essential part of any Angular application, and in the following section, we will look at their implementation. Using the Angular CLI, we will generate the framework for our own pipe within the BookModule:
> ng generate pipe book/filter-books
After execution, we get a filter-book.pipe.ts file, which can be seen in Listing 11.
import { Pipe, PipeTransform } from '@angular/core';

@Pipe({
  name: 'filterBook'
})
export class FilterBookPipe implements PipeTransform {
  transform(value: unknown, ...args: unknown[]): unknown {
    return null;
  }
}
Every pipe implements the interface PipeTransform and defines the function transform. The first parameter given here is the input value (in our case, the Book array). The other parameter is an array of additional transformation parameters that we can use to perform specific manipulations of our input values. This includes the shortDate parameter in our date pipe, for example. As a return value, we will provide a Book array with all the books that match our filter parameter.
To keep it simple, we will just pass a text to the pipe as a filter parameter. Using this parameter, we will iterate over the book array and compare whether any of the titles contain the given search term. The code is included in Listing 12.
...
export class FilterBooksPipe implements PipeTransform {
  transform(books: Book[] | null, searchTerm: string | null): Book[] {
    if (!searchTerm) {
      return books || [];
    }

    if (!books) {
      return [];
    }

    return books.filter(book =>
      book.title.toLowerCase().includes(searchTerm.toLowerCase())
    );
  }
}
Every JavaScript array has a built-in filtering function [7] that helps us filter an array. Since in theory, both the Book array and the filter parameter may not be defined, we must check this beforehand.
Our first pipe is implemented, now we have to apply it inside the template. The decorator @Pipe() tells us how to call our pipe:
<app-book-card
  *ngFor="let book of books | filterBook: bookSearchTerm"
         (ping)="handlePing($event)"
         [bookEntry]="book">
</app-book-card>
The filter parameter should be dependent on the user input in an input field. Therefore, we define the property bookSearchTerm within the component class. For our last step, we need an input field within the BookComponent, including an event binding to the input event that is triggered as soon as the user makes an input:
<input
  placeholder="Filter your books..."
  (input)="updateBookSearchTerm($event)"
/>
In addition, there is the corresponding implementation within the file book-component.ts:
updateBookSearchTerm(input: Event) {
  this.bookSearchTerm = (input.target as HTMLInputElement).value;
}
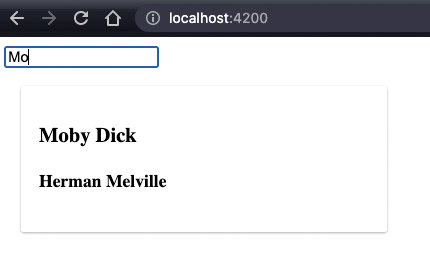
There, we update the filter parameter every time the user enters a new value. Angular also offers other, more efficient ways to connect controls that we have defined in the template to the component class. However, we won’t learn about these until later in the article series. So for now, we’ll remedy the situation by binding to the input event. After recompiling and loading the application in our web browser, we can try our filter. Figure 9 shows the result.
Conclusion
With our application in this state, I will now end the second part of my article series. Our application already has some functionality. We learned how to display a list of books using template syntax and structural directives, and created our first components and a module. With an Angular pipe, we can perform transformations of input data and even implement simple book filtering. Of course, we can also extend the filter as we wish, so that all properties of a book object are examined to see if the filter parameter is included.
In the next article in this series, I will leave the UI layer and dive into data retrieval. Currently, our book data resides in our component. This is not a permanent solution, and the goal is to have services provide us with the appropriate data. In the process, we’ll learn about dependency injection in an Angular application and how to create Angular services, among other things.
Links & Literature
[1] https://developer.mozilla.org/en-US/docs/Web/HTML/Attributes
[2] https://blog.angular-university.io/how-does-angular-2-change-detection-really-work/
[3] https://developer.mozilla.org/en-US/docs/Web/Events
[4] https://angular.io/guide/module-types
[5] https://angular.io/api?type=pipe
[6] Other parameters: https://angular.io/api/common/DatePipe
[7] https://developer.mozilla.org/en-US/docs/Web/JavaScript/Reference/Global_Objects/Array/filter