Blog Series Overview
- Angular for beginners
- The building blocks of an Angular app
- Angular’s Data Layer
- Observables: Reactive with RxJS
- No Angular SPA without routing
But what exactly is Angular and what are the advantages and disadvantages of this solution? And wasn’t there once AngularJS? In this series of articles about Angular, I would like to introduce you to the framework’s concepts and tools. Together, we’ll develop a small CRUD application and find out how we can implement user interactions, data queries to an HTTP server, and forms with Angular. But for now, we’ll take a look at what Angular actually is, explore the ecosystem, and get to know its individual components.
Distinction from AngularJS
Before we look at Angular in detail, we should understand the differences with AngularJS. Angular was written from scratch as a successor to AngularJS and differs in many ways: In AngularJS, applications are subdivided into modules such as templates, controllers, scopes, and providers, only parts of which can be found in an Angular application – although Angular still has something like templates and providers.
Where applications in AngularJS were still implemented in JavaScript, Angular recommends the use of TypeScript. Also, handling asynchronous tasks was mostly based on Promises in AngularJS, whereas Angular relies entirely on the RxJS library, which implements the Observable pattern. We’ll take a closer look at that later.
In summary, it’s simply wrong to say that Angular and AngularJS are actually the same framework and that an AngularJS application could be easily migrated to Angular. While migration tools can help, it usually reduces the effort significantly if you develop the AngularJS application from scratch in Angular.
iJS Newsletter
Join the JavaScript community and keep up with the latest news!
What is Angular?
Angular is a platform for developing performant, efficient, and complex web applications. It was created by several development teams at Google and a community of individuals and published as open source software. Angular Core developer Igor Minar articulated the vision behind it as follows: Angular is intended to be a platform that…
- developers love to develop web applications with.
- provides the highest user experience for its users.
- has a huge community where every person feels welcome.
Angular 2 was announced in September 2014 and caused controversy in the community. In December 2015 the first beta version was released and in May 2016 the first release candidate arrived. In the meantime, we receive a new major release every 6 months – as of May 2021, v12 is the current version.
Angular recommends the use of TypeScript, which offers other advantages besides type safety, such as generics, reflection, enums, and decorators.TypeScript is a superset of ECMAScript, but it has also evolved steadily in recent years. As a result, Angular developers can now choose to implement their application with ECMAScript. Additionally, it will no longer ship with the TSLint library in version 12, as this has already been marked as deprecated since January 2020.
Angular as a platform
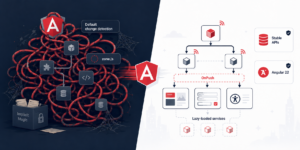
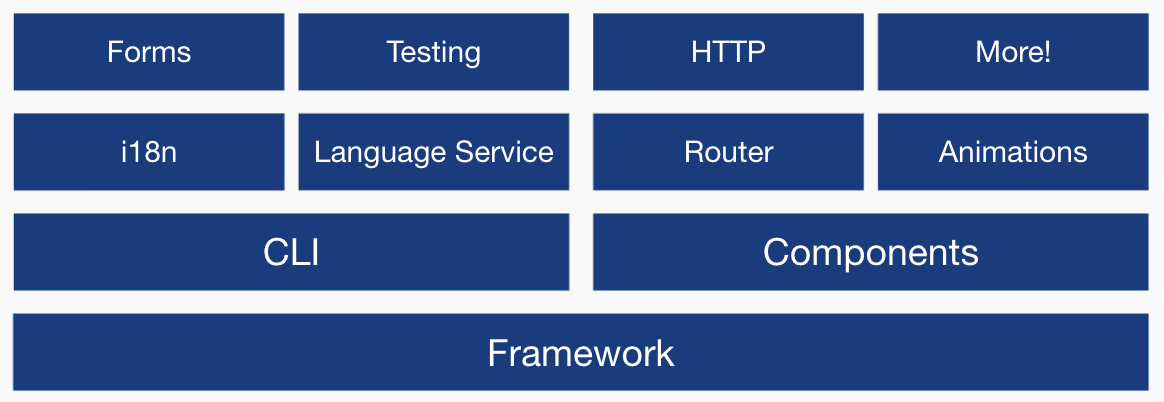
If you talk about Angular these days, you quickly learn that it is no longer a small frontend framework. The complete software ecosystem is huge and offers numerous ready-made solutions for problems like multilingualism or mobile-first approaches. We already receive some of these as pre-installed packages when creating an Angular application (Fig. 1).
Many web developers criticize Angular applications for being relatively inflexible. If I want to implement routing within my application, for example, it’s hard to use a library other than the one Angular provides. But in return, this also saves a lot of trouble with compatibility problems between individual libraries. When I update my Angular software, all related packages are updated directly. I don’t have to keep searching for a suitable package and decide if I should use it based on the number of users or open issues on GitHub.

Requirements and installation
To create an Angular application, first, we need Node.js (it is best to always download the LTS version). This is a JavaScript runtime based on Google Chrome’s JavaScript Engine V8. Node.js can be installed on all operating systems. If you want, you can also install the Node Version Manager directly, which can be used to install different Node.js versions in parallel. In any case, the Node Package Manager – npm for short – is delivered with Node. Which version of Node and npm are installed can be requested as follows:
> node -v
v14.16.0
> npm -v
6.14.11
npm now helps us install the Angular CLI:
> npm install -g @angular/cli
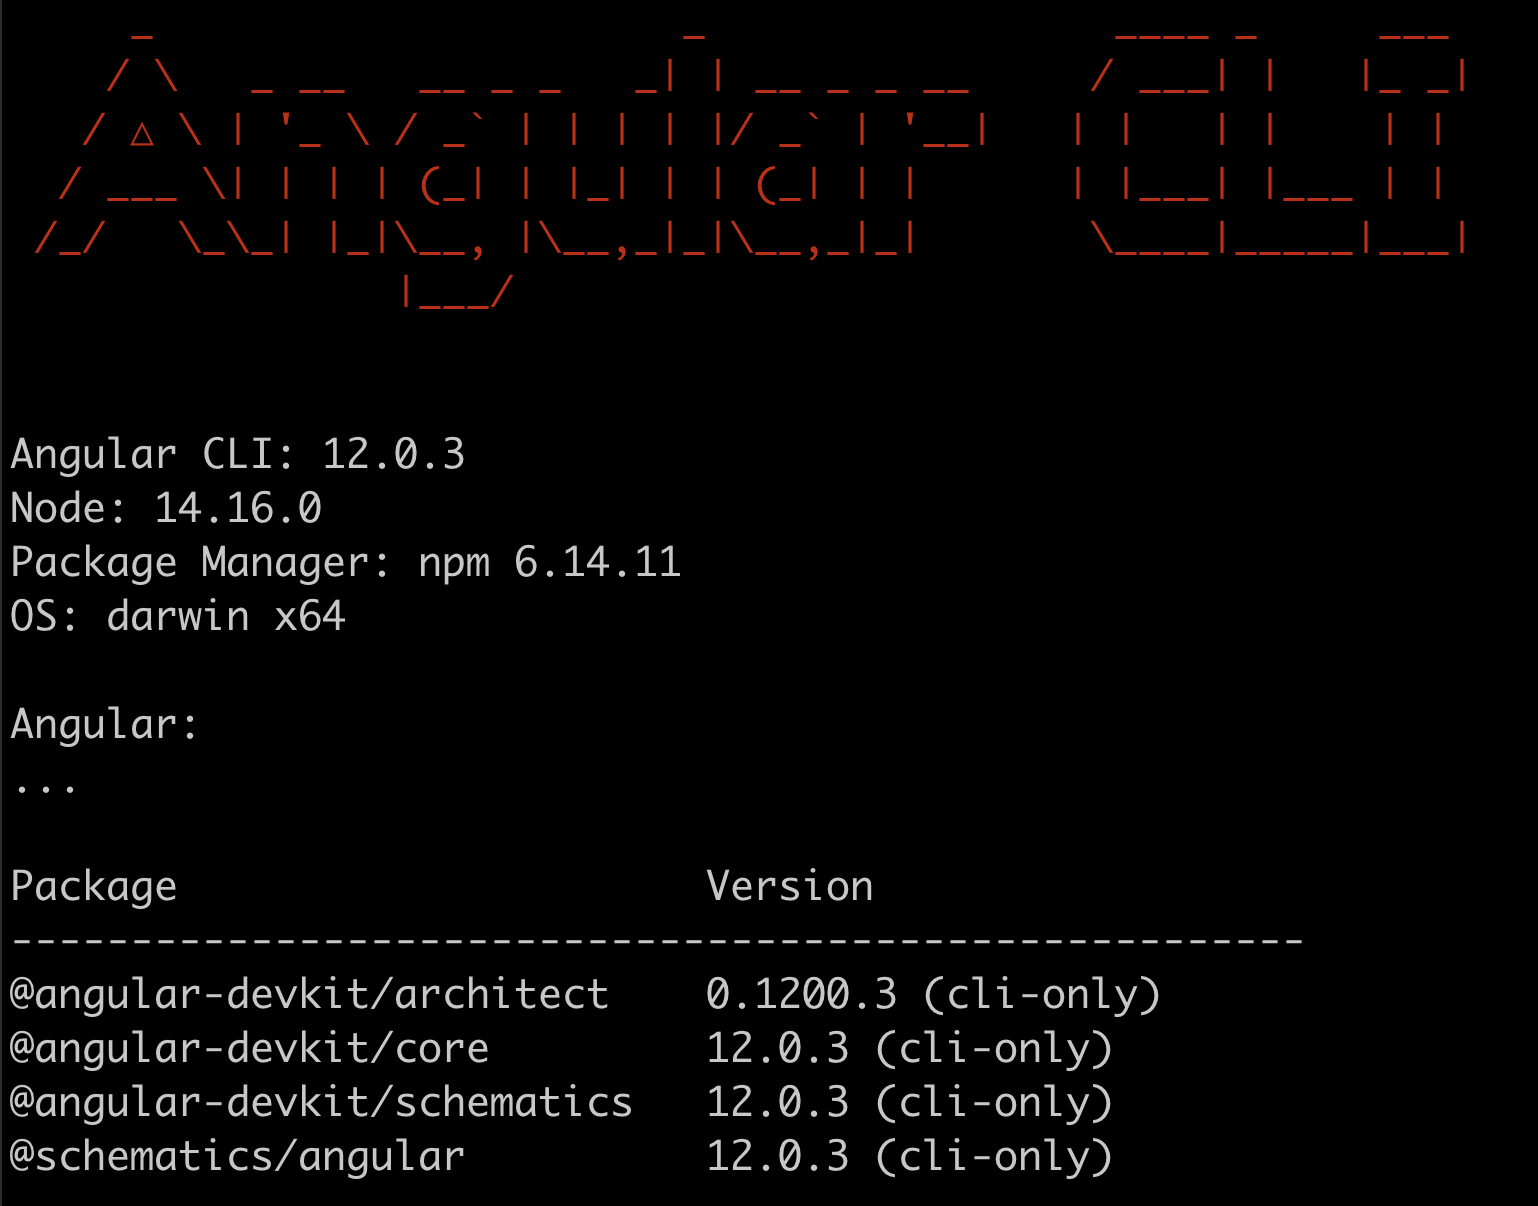
The -g parameter specifies that we want to install the Angular CLI globally on our computer. This way we can call the CLI completely independent of the command line. After successful installation, we can now also check the installed version with > ng –version and check that the installation worked. The result can be seen in Figure 2.
The Angular CLI
The Angular CLI is mainly used as a tool for us to build our Angular application and generate code of individual Angular building blocks during development. Besides that, the CLI also provides commands for static code analysis as well as performing unit, integration, or E2E tests and deployment support – including various optimizations for creating the JavaScript bundle. We get a complete list of all features by running > ng help.
We will encounter some of these features in the next parts of this series. But for now, let’s turn our attention to the creation of an application:
> ng new book-app
After input, we are asked several questions within the command line, shown in Figure 3.

Since we will deal with routing later, we don’t need this feature right now. Next, we are asked which stylesheet format we want to use. We could also avoid these questions by giving the configurations as parameters directly when creating the project:
> ng new book-app --routing=false --style=scss
If we open the project in our development environment, we see the folder structure shown in Figure 4.
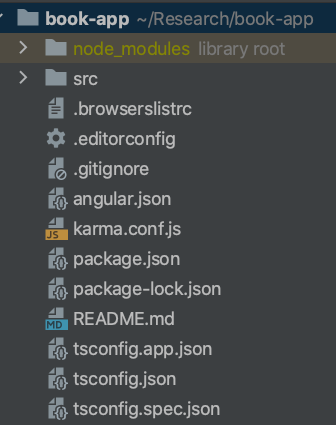
As you can see, a folder has been created for us and is named after our project book-app. All our application code is inside the src folder. Before we look at this folder, let’s see some other files that were generated.
As the name package.json suggests, this is where all the dependent packages are located that have already been installed to make our application executable (Listing 1).
"dependencies": {
  "@angular/animations": "~12.0.3",
  "@angular/common": "~12.0.3",
  "@angular/compiler": "~12.0.3",
  "@angular/core": "~12.0.3",
  "@angular/forms": "~12.0.3",
  "@angular/platform-browser": "~12.0.3",
  "@angular/platform-browser-dynamic": "~12.0.3",
  "@angular/router": "~12.0.3",
  "rxjs": "~6.6.0",
  "tslib": "^2.1.0",
  "zone.js": "~0.11.4"
},
In addition to the dependencies required for the runtime of our application, there are also the devDependencies. We use the associated packages during development. This includes Karma, the Angular test runner. All packages are already installed and viewed inside the node_modules folder.
Since we are implementing our application with TypeScript, we also need a configuration file tsconfig.json that allows us to change settings on the TypeScript compiler (Listing 2). For example, we can define the ECMAScript version that our TypeScript code should be transpiled to.
"compilerOptions": {
  ...
  "noImplicitReturns": true,
  "sourceMap": true,
  ...
  "target": "es2017",
  ...
In addition to the TypeScript compiler, there is also an Angular compiler. This compiles Angular code into JavaScript in cooperation with the TypeScript compiler. We can configure this Angular compiler here under angularCompiler-Options.
Angular lets us use completely different settings for translating the TypeScript code in our application than for the test code. In addition to tsconfig.json, we can also find the files tsconfig.app.json and tsconfig.spec.json, both of which can extend or override the generic settings of the TypeScript compiler in tsconfig.json.
Last but not least, we also have a configuration file for our Angular CLI – angular.json. In this file, we can influence how the CLI generates Angular code. In addition, file and folder paths are configured, which the CLI uses to know under which path it can find tsconfig.json or the src folder. We will now look at this in more detail.
Our Angular application
Now it’s time to see our Angular application in action. To do this, we need to compile the Angular and TypeScript code into JavaScript, combine it into a JavaScript bundle, and then deliver it using a web server, right? Don’t worry, the Angular CLI takes care of that too. Under the hood of the CLI is the module bundler webpack. However, the configuration of webpack is completely enclosed and can only be done via commands in the Angular CLI. While it’s also possible to extract “partial webpack configs” and include them in the Angular application, this is usually not provided for. webpack gives us a development server that we can use to deliver our Angular application.
To start our application, we don’t have to do anything but run > ng
serve (Fig. 5).
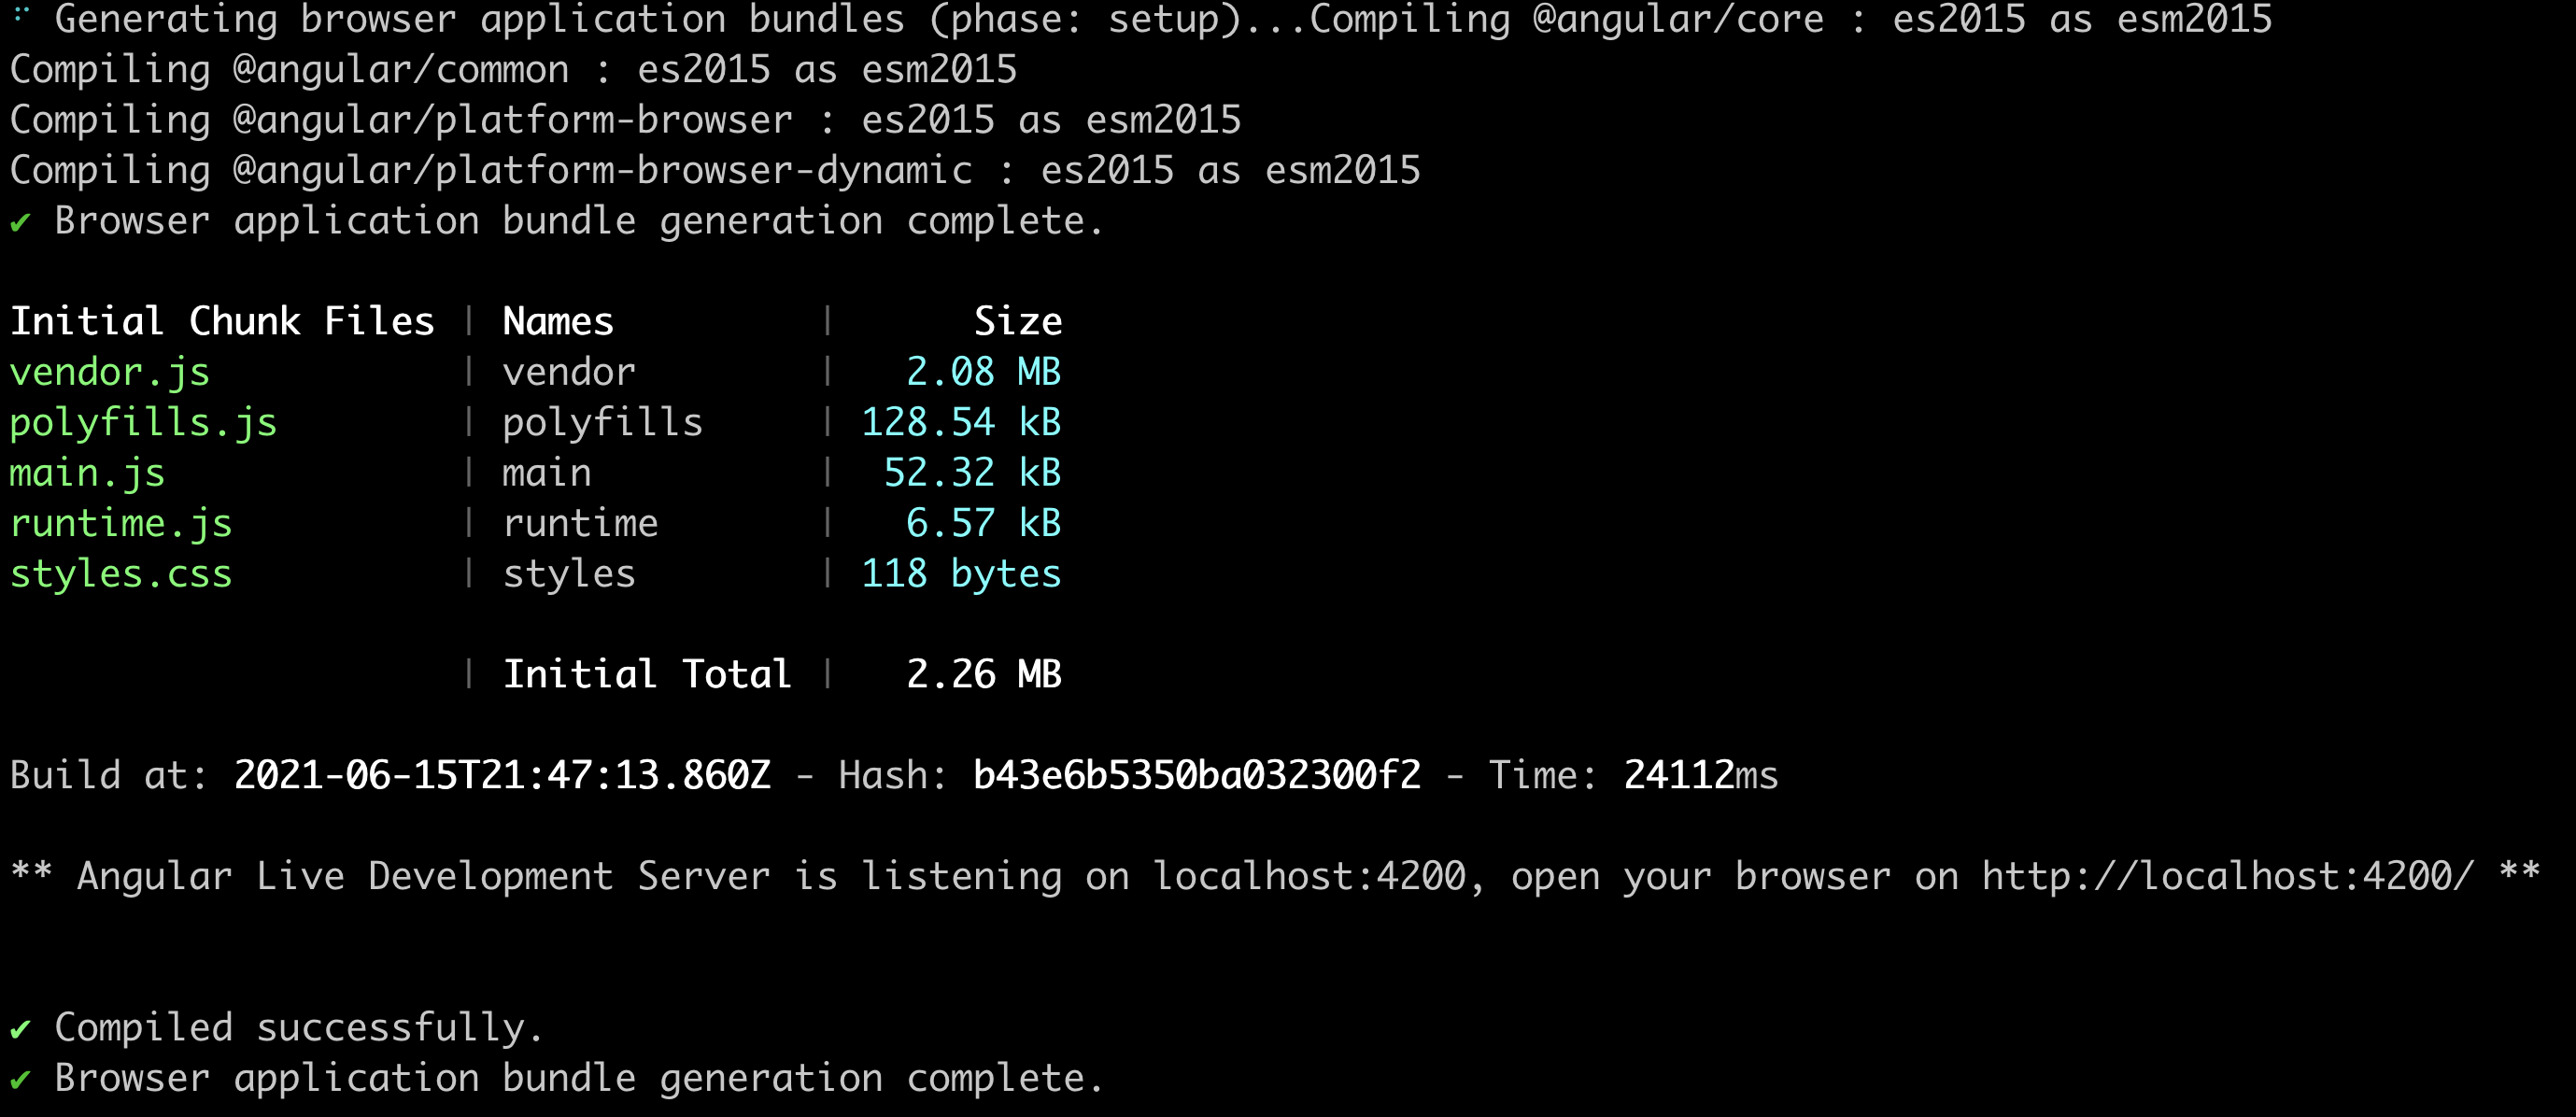
In doing so, we can track that all JavaScript bundles are generated after compiling our Angular and TypeScript code. Of course, this is just a bundle without any optimizations. This still gives us the option to debug the application in our web browser, for example. After successful execution, we receive a message that our application is now accessible at http://localhost:4200 (Fig. 6).

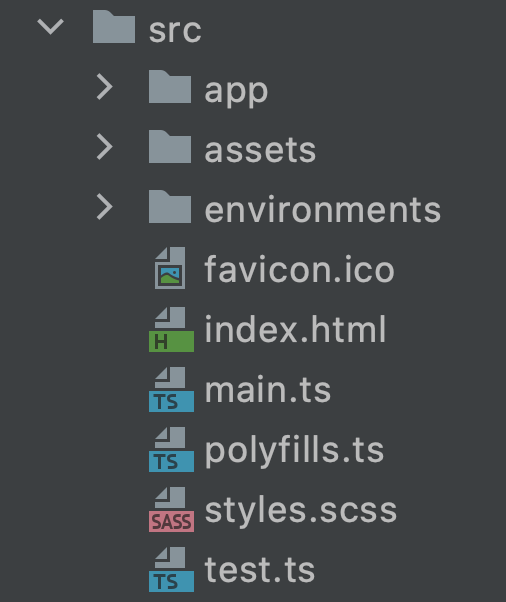
Now, if we call the URL in our web browser, we will see a small welcome page that was generated by the CLI. The entire source code for the development of our app is inside the src folder. If we open this folder, we will find more files and an app folder, as shown in Figure 7.
The index.html is the main component of our Single Page Application. Only this single HTML file is delivered. The complete HTML body is generated at runtime with the help of JavaScript – this is the concept of a Single Page Application.
There is only one line inside the HTML body of our index.html:
<app-root></app-root>
This HTML tag is not real, valid HTML, of course. It inserts our first Angular component: the AppComponent.
Angular components
Angular implements the modern concept of web components. The goal of web components is to create reusable building blocks for the web. For this to be the case, the properties of the component, such as the styling or the behavior, must be enclosed.
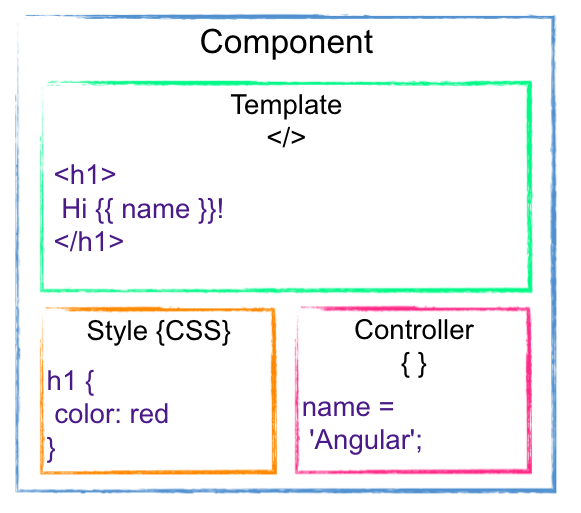
Angular components are the fundamental building blocks of any Angular application. This is how you divide your application into different, reusable logical components. A component always contains three parts, as shown in Figure 8:
- an HTML file, the template,
- a TypeScript file that contains the component’s controller code, and
- a stylesheet file for styling the HTML.
In summary, we could say that the template determines what is displayed, the stylesheet determines how it should look and the TypeScript code implements how the component should behave. If we open the app folder, we will also find these three files:
- app.component.html
- app.component.ts
- app.components.scss
In addition, we also find an app.component.spec.ts file, which we will need later to test our component. While there is nothing interesting in the HTML and stylesheet file so far, we should now take a closer look at the TypeScript file (Listing 3).
import { Component } from '@angular/core';

@Component({
  selector: 'app-root',
  templateUrl: './app.component.html',
  styleUrls: ['./app.component.scss']
})
export class AppComponent {
  title = 'book-app';
}
Besides a normal class, we also see a Component Decorator. This decorator adds to the class all the logic we need to use the AppComponent as an Angular component.
When we look at the Decorator properties, we immediately notice a string we’ve seen before: app-root. It appears in the form of an HTML tag inside the index.html. So this means that the selector helps us include a component in an HTML template. However, only one component may be included in the index.html. All components that we create in the course of the project are consequently entered into the AppComponent template.
It becomes quickly apparent that the templateUrl and styleUrls properties provide information about where the HTML and stylesheet files belonging to the component are located. Here, a component can also include multiple stylesheet files. This means that the welcome page we have already seen in our web browser must be outlined in our app.component.html. If we still have our web browser open to our displayed application, then we can get to know another feature of the Angular CLI. To do this, we delete all the HTML inside the AppComponent template and save the file. During this process, we see something happening on the command line where our development server is running: Our code is being recompiled and packaged directly. Additionally, our application in the web browser has also updated all by itself. This is the hot reloading feature.
webpack automatically triggers a new compilation of the code after saving the changed files and pings the web browser to fetch the new bundle from the development server. This feature makes development much easier, since changes are immediately displayed and application runtime errors are immediately detected.
iJS Newsletter
Join the JavaScript community and keep up with the latest news!
Angular components
To conclude the first part of this article series, let’s talk about an aspect that we haven’t mentioned yet: Angular modules are data structures that group related building blocks together like Angular components. This can be seen in Listing 4.
import { NgModule } from '@angular/core';
import { BrowserModule } from '@angular/platform-browser';

import { AppComponent } from './app.component';

@NgModule({
  declarations: [
    AppComponent
  ],
  imports: [
    BrowserModule
  ],
  providers: [],
  bootstrap: [AppComponent]
})
export class AppModule { }
For now, this is just a simple TypeScript class that gets more functionality with the NgModule decorator:
- declarations defines the components of the module. Here a component can be declared only in a module. This already contains our AppComponent. During our project, more new Angular components will end up here.
- imports: This allows us to import further modules that provide additional components, for example. Currently, only the BrowserModule is imported. With the help of this module, our application receives all the functionality to run Angular in the browser.
- providers: Here we can register services. These form the data layer of an application.
- bootstrap: This is where all components are referenced that will be created at application startup. In most cases, this is just a single component: our AppComponent, which is also often called the root component.
The module that provides the root component is also our root module. When the application is launched, this module is passed and renders the components inside it within the bootstrap property. In our case, this is just the AppComponent.
In the course of this article series, we will generate our own modules and import them into the AppModule. However, it’s important here that the root module (our AppModule) must never be imported into another module. This module is our entry point for the compiler, which generates the initial JavaScript bundle from it. All modules that we import here or components that we declare end up in this JavaScript bundle. Therefore, it’s important not to inflate this unnecessarily in order to keep our application’s initial load time as low as possible. We will learn some mechanisms to help us achieve that.
For now, this article could only give an insight into Angular and how to create an application with the help of the huge platform. In the next article, we will devote ourselves entirely to the topic of Angular component development. We will learn about different ways to connect our TypeScript code to the template. Furthermore, we will also deal with the question of how we can exchange data between Angular components.