Allow me to ask you a small, somewhat thought-provoking question? How are modern web applications built these days? That’s right: the HTML5, CSS, and JavaScript standards make it possible. With the help of HTML, we specify the structures of our application and define its content. CSS ensures that it looks good, has a suitable layout, and consistent styling. While with JavaScript – pardon, ECMAScript – we implement the behavior of our application and bring it to life. This all sounds very simple and obvious, but this is exactly where the problem lies.
All this is far too simple! Today’s modern developer tends to use many different, even better, and more sophisticated and professional tools for their work! That’s what everyone does. First of all, we need a “real” programming language, not this half-baked JavaScript. So, we replace JavaScript/ECMAScript with TypeScript in order to have a very popular language in our project. It can do everything your heart desires. We can program either object-oriented or functional, have type safety, and everything else that we need is on board. In the area of structures and content, simple HTML is of course no longer enough for us. HTML, like JavaScript, can only be a basic technology. On top of HTML, we need to use a framework – after all, that’s what everyone does – and we want to build our own, reusable HTML components. So, HTML only runs underneath and on top, we use React or Vue to get structure by realizing a component-based architecture. But what about CSS? Honestly: No one can read its weird syntax, so we need a CSS preprocessor to write CSS in a short and simple way. The possibilities are endless. For example, we can replace CSS with Sass.

The complexity increases
The tools mentioned so far make sense and have a raison d’être; they make our programming work easier and make us more efficient. But – and this is important to understand – the complexity is increasing. It continues to increase even more: as if everything up to this point wasn’t complicated enough, we tend to look for and use more libraries to solve every problem and new requirement we have. After all, these libraries already exist, so there’s no need to write them yourself. What is the real added value? If you look at the web projects of various companies based on HTML5, CSS, and JavaScript, this principle is the main topic. You will find many dependencies everywhere: Do you need a library to display data in a table? Well, you already have AGGrid in your project. Since the average software developers are usually not designers, a web application’s layout is rarely designed in CSS or Sass itself. Instead, a design language is incorporated, such as Ant Design or Material Design. These are Sass/CSS templates that can be used to give a web application a consistent, professional design. Ant Design and many other similar tools come with a large number of prefabricated interface components that can be used directly with React or Vue. It all makes sense and is used happily. For date and time processing, Moment.js is integrated. For calling web APIs, Axios is a good choice and Lodash can be found in almost every self-respecting web project. You will want to reap the benefits and get all the help you can. Hopefully, you can already see what I’m getting at. More dependencies in the project means an additional level of complexity. That leads us to our next problem: in many cases, simply integrating all these libraries and additional works into your own project does not work easily. Take Lodash for example. Including and calling helper functions from this developer library directly in a JavaScript/TypeScript project causes problems. Why is that? It’s because of the way JavaScript programs assemble and are delivered to the browser.
Modular systems
For a long time, there was no standard for modularization. It’s only been around for a short time and is called ECMAScript Modules, or ESM for short. Since ESM or an official solution did not exist previously, various companies, organizations, and developers have thought about what a module system could look like, and a few popular solutions emerged. The popular project RequireJS introduced us to the AMD format. AMD stands for Asynchronous Module Definition. The aim of development was to define the sorely missed standard to be able to reload and include program parts asynchronously. CommonJS is another module system in the same vein, and it’s still around today. It was invented by the developers of Node, the JavaScript runtime environment, and it’s an integral part of every Node installation. It’s important to understand that Node was originally designed to run JavaScript applications on servers, so CommonJS is not really intended to be used in the browser. Because of this, you will often get strange error messages when including libraries in CommonJS format, as seen in Figure 1.
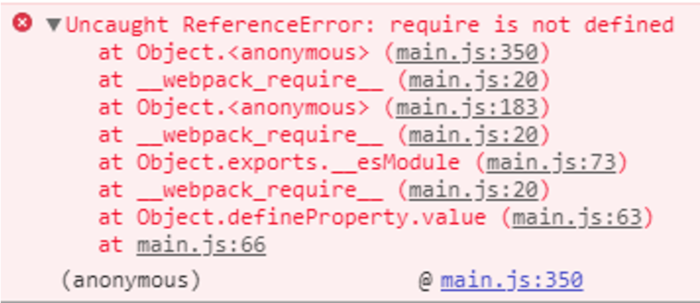
Fig. 1: Error message when including a library
The require command is a construct in the Node environment. It ensures that a module is loaded. This means that libraries based on CommonJS do not run easily in the browser. But in order to make these libraries operable in the browser, a conversion, an adaptation of the source code must take place in connection with development. The proprietary part of the module system is replaced by code that runs in the browser. This is one of the reasons why we use bundlers like webpack, Rollup, or Parcel. Most JavaScript libraries to this day rely on CommonJS because when the projects were started, this module system was the best solution. Libraries that are already available in the newer ESM module standard behave quite differently here. These are executable out of the box in the browser. The require command is replaced by import and no change of the source code via an additional step in the bundler is necessary. The good news is that more and more projects are offering their artifacts as native ESM builds in addition to CommonJS. This is exactly the direction we should move in. Going forward, we should use ESM wherever we can. However, there are still some hurdles and obstacles to overcome along the way. We have to live with the fact that with every external library we include in our project, we are also adding uncertainty. How many new difficulties due to strange behaviors or potential bugs will I bring into my project? How many additional dependencies does the new library bring along with it? Which modular system is it available in?
Why bundlers still make sense
Let’s imagine that we solved our problem with the modular system. The more dependencies we have in our project, the bigger our application becomes. This negatively impacts performance (all the stuff has to be loaded, after all) and also affects our project’s care and maintenance. Everything needs to be kept in view and up to date. Keep in mind that modern web applications based on JavaScript are extensive, complex, and consist of a whole range of different components. Just think of the many different source code files (.js/.ts). If you use frameworks like React or Vue, JSX files or single file components (.vue) are added. Resources like image files still exist and sometimes HTML files too. Every project has at least one HTML file to start with, namely the index.html. For the design, all kinds of CSS files and project configurations are added. Furthermore, settings are often stored in JSON or YAML files. And that’s not all. The aforementioned dependencies and bundlers also come into play! Simply put, this is a developer tool that takes all these different project resources, throws them into a big pot, stirs it around, and out comes a deliverable software artifact. In extreme cases, it’s all wrapped up in a single app.js file. A bundler creates a dependency graph for this purpose as part of the build process, based on the dependencies that reside in the node_modules directory. Have you ever looked in this directory? It’s usually very large. Bundlers analyze which dependencies we actually use and takes only the parts that we need. This is how the different module systems are reconciled. The bundler packs up our application, shrinks it down, modifies and transposes our code, and finally creates a deliverable software product. By the way, bundlers are also able to generate chunks, easily digestible application morsels that can be reloaded at runtime as needed (lazy loading). While the three big bundlers (webpack, Rollup, and Parcel) are more CommonJS oriented, Snowpack is a little different. Snowpack is a development tool that fully embraces the ESM standard and focuses more on the developer when compared to webpack.
First act: webpack
Please don’t think of webpack and Snowpack as competitors. In the following, we will look at a small example, first in webpack and then in Snowpack. In order to follow everything, you should have a current Node environment installed. Create a new project folder and initialize the project with the command:
npm init -y
With this, we have a package.json. From now on we can add dependencies to the project and use them. This is what we want to do. Now, you can add the additional library Lodash with the command:
npm install lodash
A node_modules directory now exists. A look into the package.json shows that Lodash is also present. We will need two subfolders: src and public.
<!-- index.html -->
<!DOCTYPE html>
<html lang="en">
  <head>
    <meta charset="UTF-8">
    <meta http-equiv="X-UA-Compatible" content="IE=edge">
    <meta name="viewport" content="width=device-width, initial-scale=1.0">
    <title>Document</title>
    <script src="../dist/main.js"></script>
  </head>
</html>


// index.js
import { camelCase } from 'lodash'
console.log( camelCase ('hello world'))
Listing 1 shows the initial files index.html and index.js. Please put the index.html in the public subdirectory and sort the index.js in src. If you start at the level of the project main directory with a command like
npx servor –browse
a small HTTP server (here Servor), your browser will start and you can open the index in it. However, you won’t see the expected console output in the developer tools. Instead, you’ll be punished with an error message: The browser doesn’t know about the Lodash library. In other words, it has no idea where to get the camelCase function. Now, the decisive moment has arrived: Either we use a bundler or use Lodash if it’s available in an ESM version. Let’s take a look at how the developers of Lodash deliver their project. Go to the project website and then to the download section. There you will find a link pointing to a CDN (CDN Copies). You will be redirected to JSDelivr and you now have the possibility to reference the required JavaScript file camelCase.js via URL. Figure 2 shows the source code for the camelCase function from the link provided by JSDelivr.
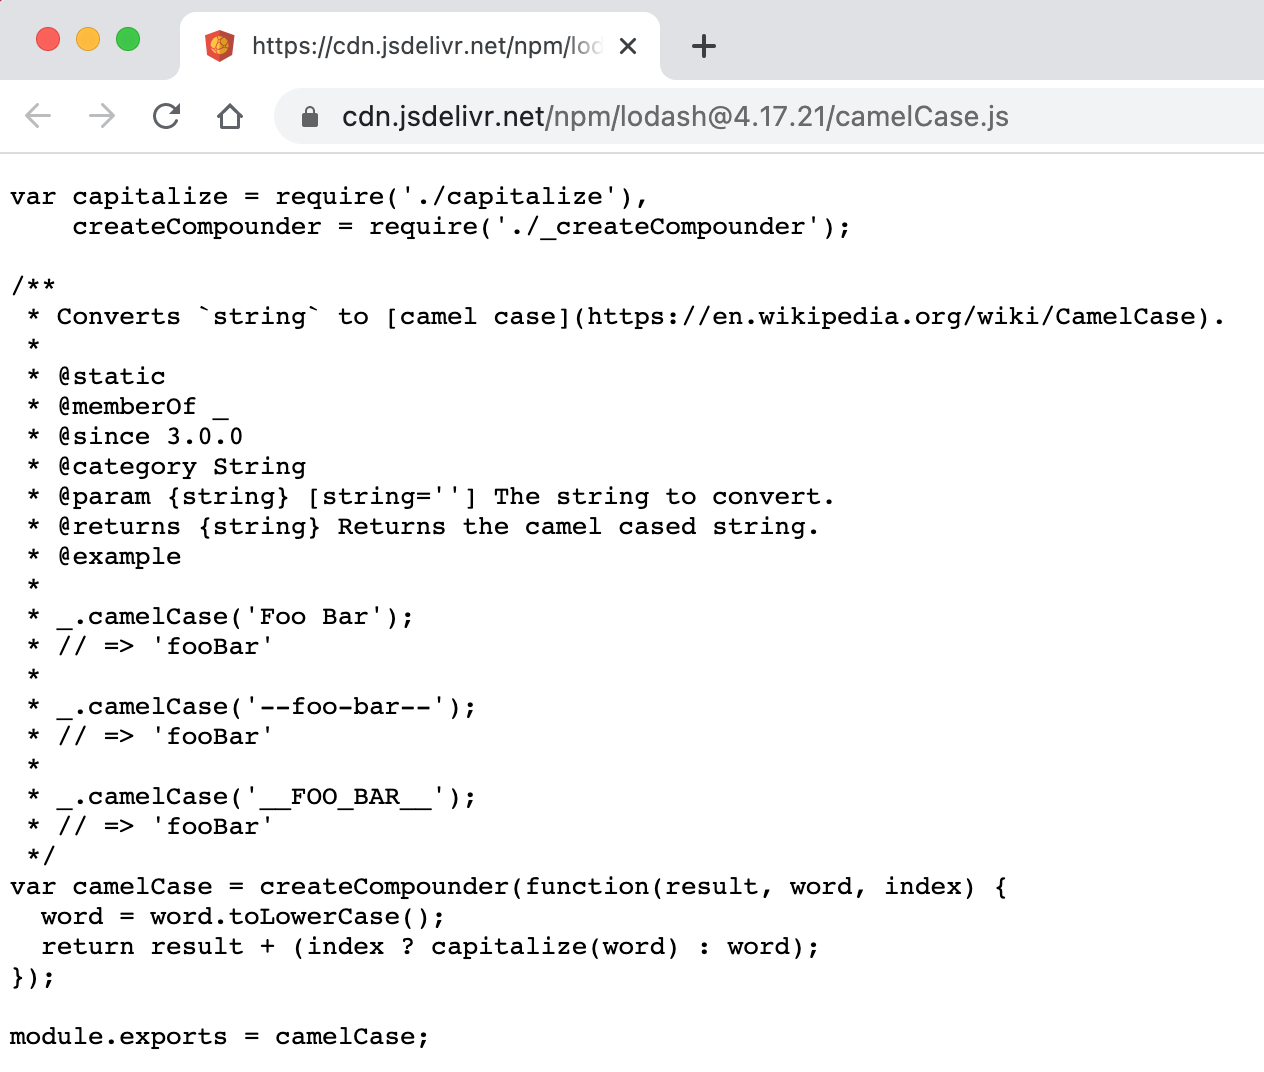
Fig. 2: A look into the source code of the Lodash-camelCase function.
The occurrence of the require command at the very beginning makes it clear that we are dealing with a piece of software in CommonJS format. At this point, we are forced to use a bundler such as webpack. So, let’s go back into the project and webpack with the command
npm install --save-dev webpack webpack-cli
as a developer dependency (–save-dev). In the package.json you should now define a start script for webpack in the scripts section as follows:
"scripts": {
  "build": "webpack"
},
Then, from the project root directory, you can start the webpack build with the command
npm run build
and finally start. If you now refer to ../dist/main.js (compare again with Listing 1) instead of ../src/index.js in the index.html and bring it to view in the browser again just as you did before with Servor, you will notice that the camelCase function can now be executed successfully. Congratulations! In just a few steps, you performed a successful build with webpack. The result of the build process is the main.js file. Take a closer look at it. Figure 3 shows that what was once a simple two-line program now consists of about 4,500 lines of code. But the worst thing about it is that the source code is incomprehensible. This may be enough for production, but for development, it’s a problem.
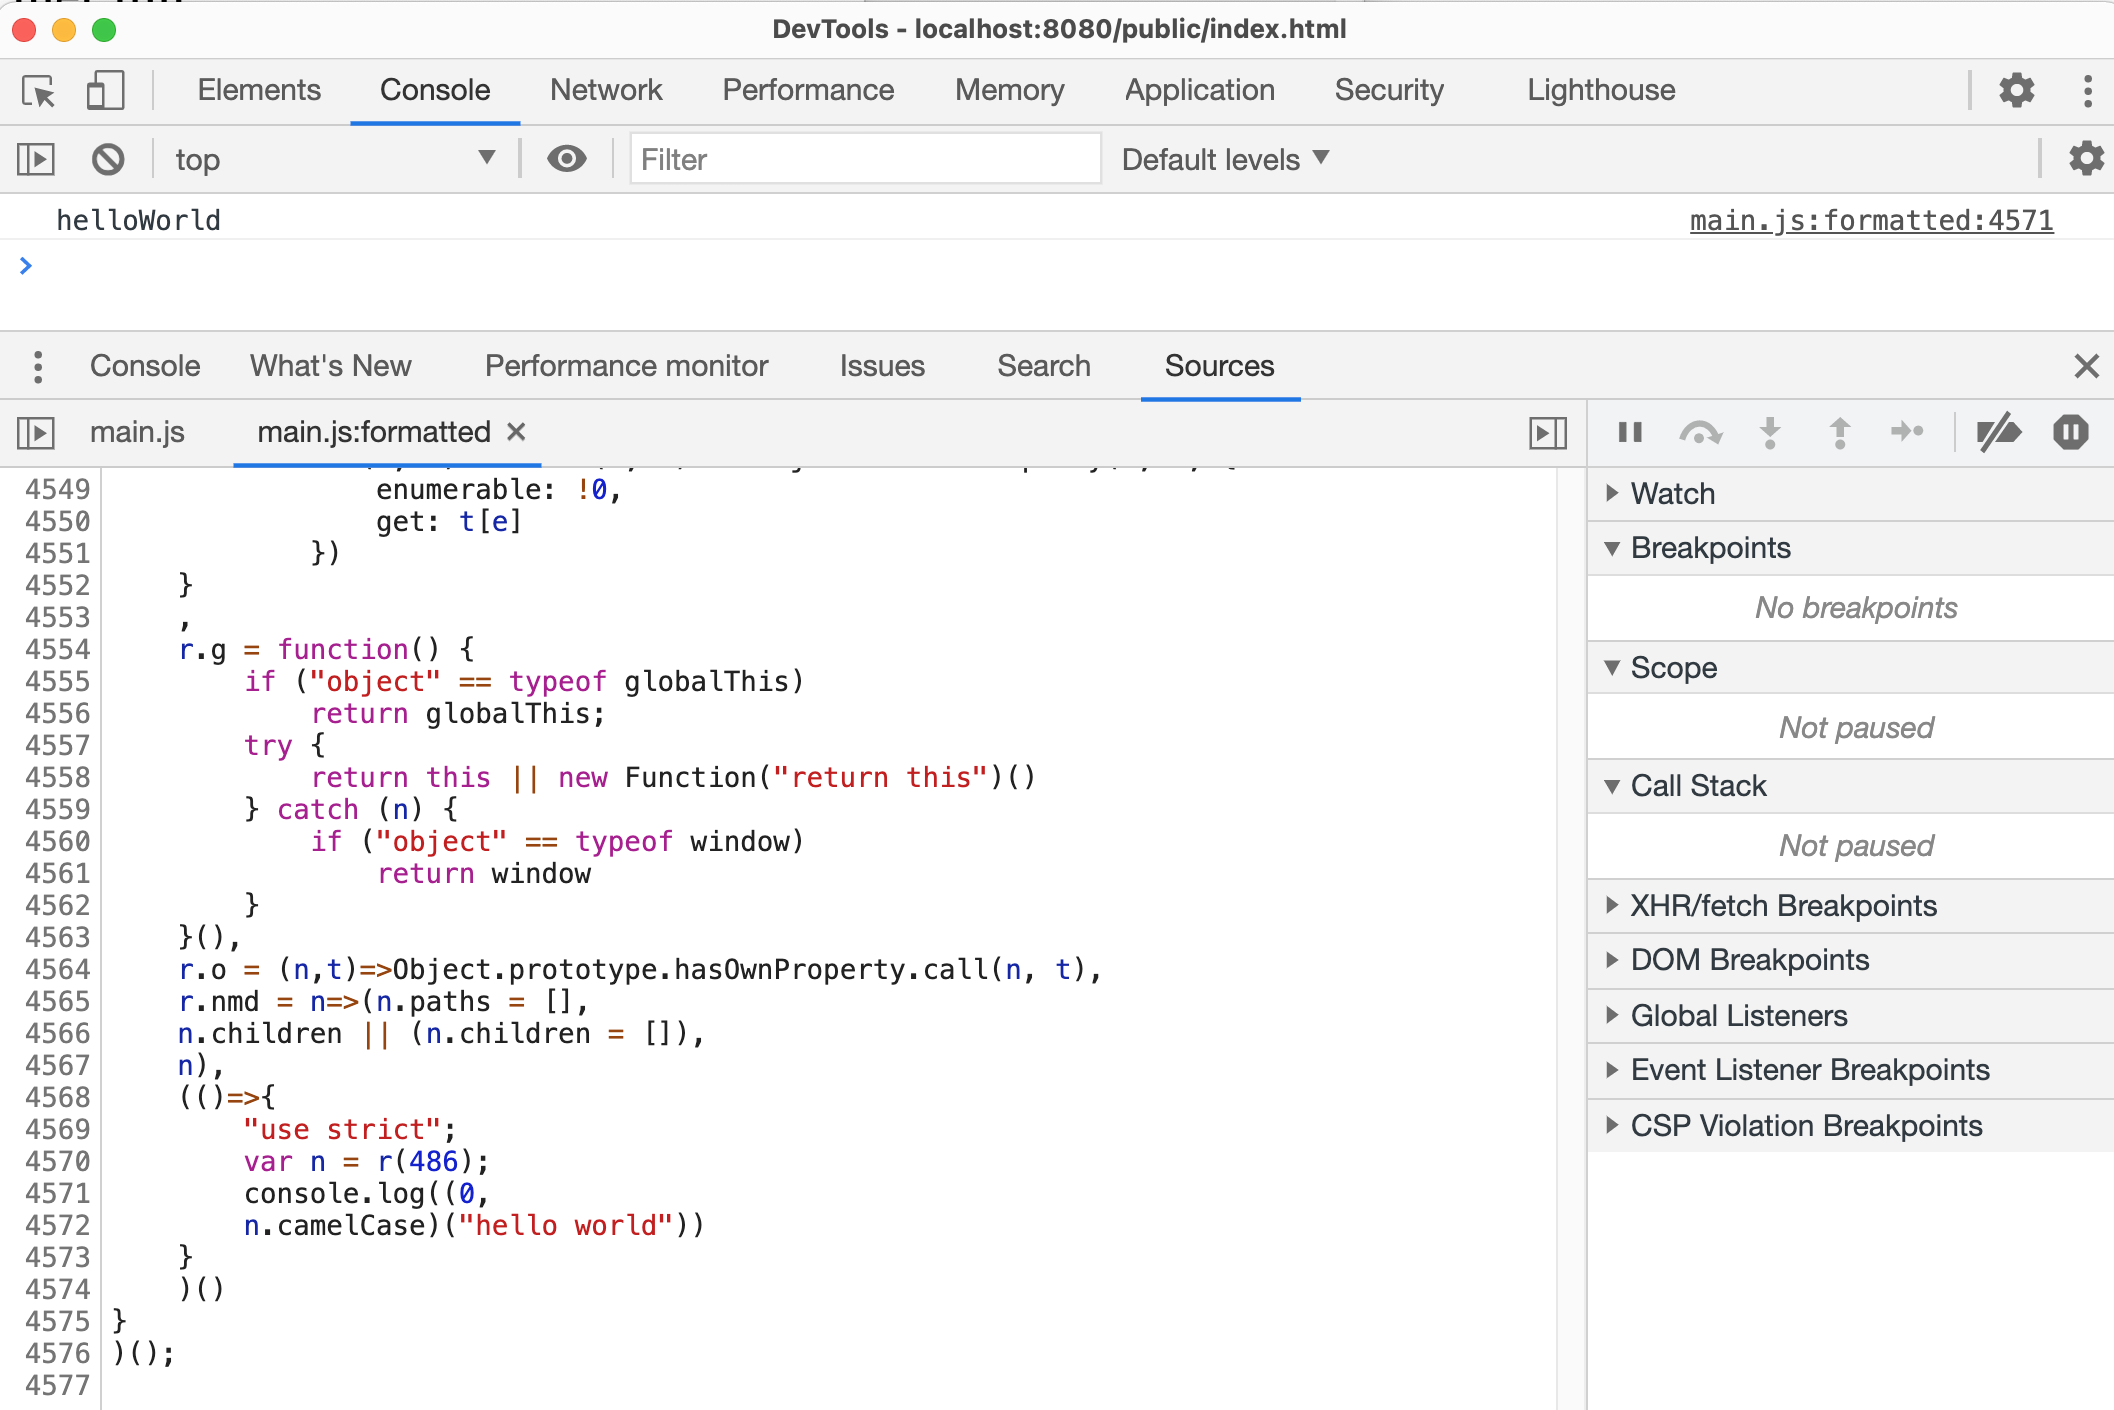
Fig. 3: Our example program code has become several thousand lines long
By the way, we use webpack here without any configuration. This only works as long as webpack can find the src/index.js file as an entry point. At this point, we could go much deeper into webpack configuration, because entry points, target directories, and webpack’s behavior can be controlled down to the smallest detail via the central configuration file webpack.config.js. Even more, loaders as a very central concept of webpack also allow us to process files and project resources that are not JavaScript during the build. For styling, there are loaders for CSS, Sass, and many more.
However, the goal of this article is not to provide a general introduction to webpack, but rather to draw attention to how quickly our JavaScript projects become complex. Due to the fact that many libraries are in older module systems (AMD, CommonJS, UMD), we rely on bundlers like webpack. However, these complicate our project setup and as a result, what they spit out in the end often has nothing to do with the original source code. Viewed prosaically, webpack not only offers advantages, but also adds several big problems:
- It generates incomprehensible, poorly understood code.
- Configuration can quickly become complex.
- The more features of webpack are used, the more additional development libraries are required in the project.
- webpack is slow. Every time you save, the entire application is rebuilt; the larger the application, the longer it takes.
iJS Newsletter
Join the JavaScript community and keep up with the latest news!
Act Two: Skypack
How can we make things easier for ourselves? One way is to rely more on standards and reduce the use of custom solutions or add-on tools where possible. So, let’s do the whole thing again, but this time without webpack, and instead fully based on the standard ESM. Create another empty project with the same folder structure as in the previous example. Make sure that you do not install any other libraries or development tools and that the package.json remains empty in the dependencies area. In Listing 2, you will now find a slightly customized index.html. Yet, JavaScript code in index.js (Listing 1) has not changed.
<!-- index.html -->
<!DOCTYPE html>
<html lang="en">
<head>
<meta charset="UTF-8">
<meta http-equiv="X-UA-Compatible" content="IE=edge">
<meta name="viewport" content="width=device-width, initial-scale=1.0">
<title>Document</title>
<img src="data:image/gif;base64,R0lGODlhAQABAIAAAAAAAP///yH5BAEAAAAALAAAAAABAAEAAAIBRAA7" data-wp-preserve="%3Cscript%20type%3D%22module%22%20src%3D%22..%2Fsrc%2Fmain.js%22%3E%3C%2Fscript%3E" data-mce-resize="false" data-mce-placeholder="1" class="mce-object" width="20" height="20" alt="&lt;script&gt;" title="&lt;script&gt;" />
</head>
<body>
<div id="app"></div>
Hello ESM World!
</body>
</html>
It’s important that the module system ESM must be explicitly activated in the browser. We achieve this by using the attribute type (type=”module”) in the script tag. You can ignore the <div> in the body for now. We’ll need that later when we include React using streaming imports. However, you’ve likely already guessed that this setup won’t run after starting the Servor HTTP server. The Lodash library is not yet available. We also know that Lodash is only available in CommonJS format. So, what now? Include via npm doesn’t work, because we would only get the CommonJS version. At this point, I’d like to draw your attention to Skypack.dev as a modern alternative to npm. This is a CDN (Content Delivery Network) where many JavaScript libraries are available in ESM format – this is its special feature. Figure 4 shows that Lodash can also be obtained via Skypack.
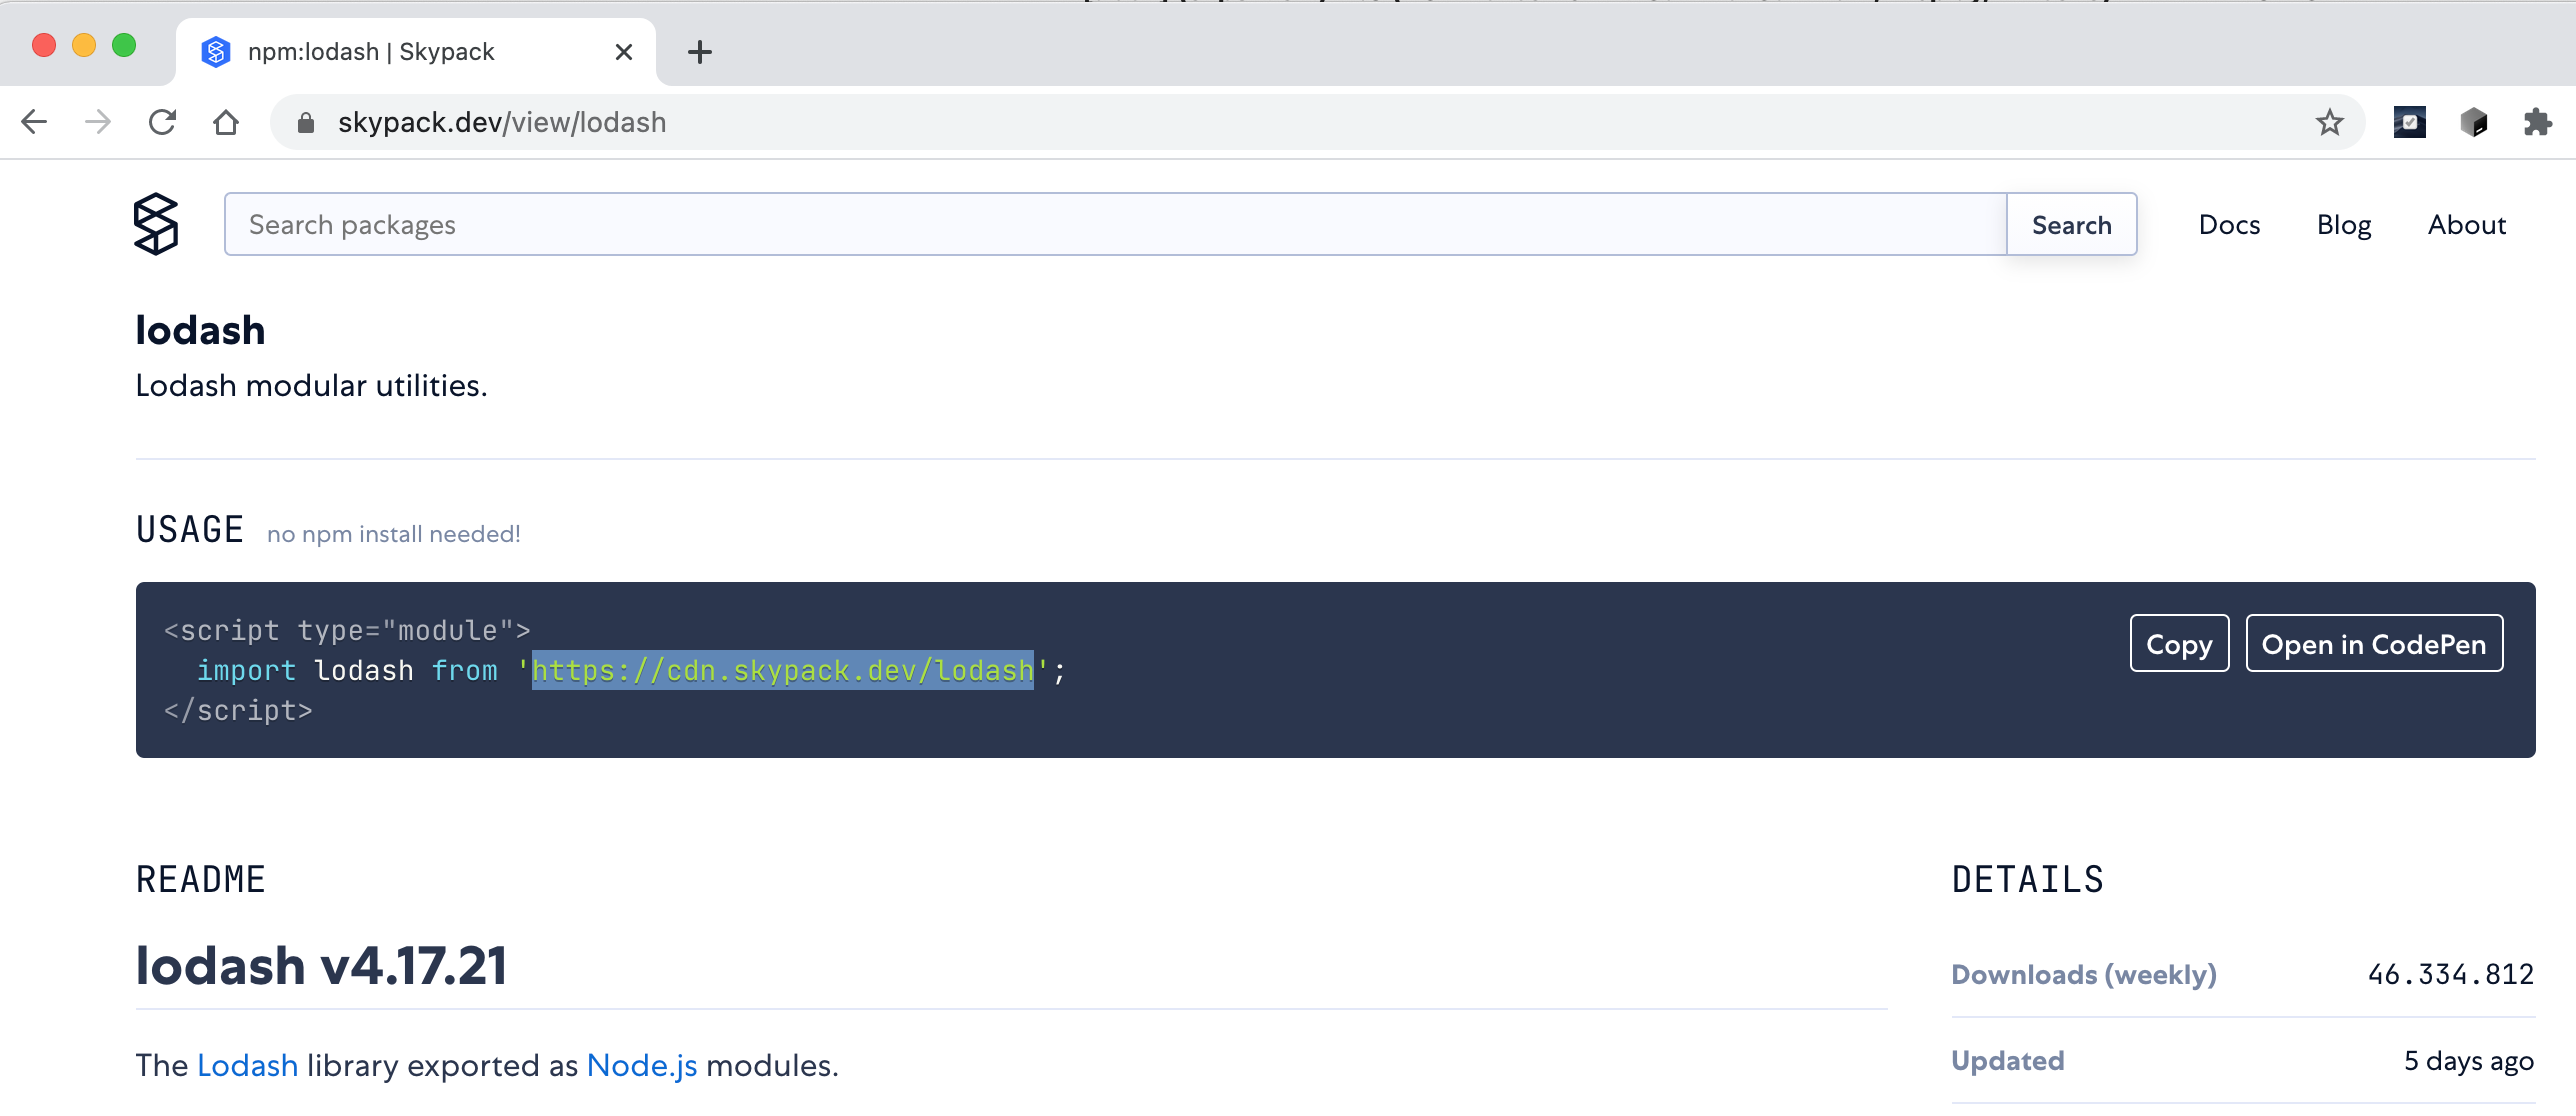
Fig. 4: Skypack gives you access to millions of JavaScript packages in ESM format.
In total, over 28 million packages are hosted on Skypack. The chance that your library is there is pretty high. All you need to do now is copy the shown import statement (Fig. 4) into your project. To do this, replace the first line in index.js. Please note: this will provide a global object lodash, so you need to call the camelCase function through this object. Alternatively, import the camelCase function directly:
import { camelCase } from 'https://cdn.skypack.dev/lodash'
This is great because in one fell swoop, it frees us from a lot of legacy and additional complexity due to development tools and their configuration. But this method also has a few major disadvantages: The dependencies are reloaded from the Internet via the Skypack CDN every time. A predetermined breaking point is created, and so, we become dependent. All libraries must always be loaded from there, which is too slow in the long run and will likely fail due to the common security guidelines that many companies hold. We also can’t easily create a build that we can import independently from the Internet when we release our software, along with all the associated dependencies.
Act Three: Snowpack
Snowpack enters the arena. It should not be seen as a competitor to webpack, since it imagines web development differently. Snowpack builds consistently on the ESM standard and is a tool that focuses more on the act of software development than on the eventual delivery. It’s no wonder that Snowpack is often used together with webpack; up front in development, everything is based on ESM, with active support from Snowpack. Out in the backend, webpack gets an optimized build for deploying the application to production. Snowpack accelerates your software development because it only touches the source code files that have actually changed. Like webpack, Snowpack comes with its own dev server based on HTTP, with debugging and hot code replacement included. As part of the Snowpack build process, the dependencies you have in the project are converted to an ESM format and written to a target directory along with your application. With Snowpack 3, the current version. If we want to, we can even do without npm install and the node_modules directory altogether. Under the keyword Streaming Imports, Snowpack has a built-in integration with Skypack. This means that dependencies are no longer pulled from node_modules, but instead, are downloaded and integrated by Skypack. Snowpack and Skypack are a good fit. This is clear from the projects’ names and because both projects come from the same author. First, we will use Snowpack together with npm for the time being. You can install Snowpack and the Lodash library with the following commands:
npm install --save lodash
npm install --save-dev snowpack
Now make sure that the import in the first line of index.js no longer points to the URL in the Skypack CDN:
import { camelCase } from 'lodash'
In the index.html, leave the ESM module system on and include the index.js that will have been created after the build process of Snowpack:
<img src="data:image/gif;base64,R0lGODlhAQABAIAAAAAAAP///yH5BAEAAAAALAAAAAABAAEAAAIBRAA7" data-wp-preserve="%3Cscript%20type%3D%22module%22%20src%3D%22_dist_%2Findex.js%22%3E%3C%2Fscript%3E" data-mce-resize="false" data-mce-placeholder="1" class="mce-object" width="20" height="20" alt="&lt;script&gt;" title="&lt;script&gt;" />
Please note the folder _dist_, which is now referenced. In Snowpack this is called a mount. With a mount, we communicate where Snowpack finds entry points. For the configuration of Snowpack, just as for webpack, there is a central configuration file snowpack.config.js and in this, the mount can be set:
module.exports = {
  mount: {
    public: { url: "/", static: true },
    src: { url: "/_dist_" }
  }
}
With this, we define that the Snowpack dev server provides all files under /, that static resources like HTML files or images may also be used, and that under the mount point _dist_ the source code directory src should always be pointed to. We’re missing a few useful scripts for the package.json, so that we can comfortably start the dev server and of course, the build process itself:
"scripts": {
  "dev": "snowpack dev",
  "reload": "snowpack dev --reload",
  "build": "snowpack build"
},
That’s about it for the setup of Snowpack. If we now start Snowpack with a simple
npm run reload
all dependencies are analyzed and brought into the ESM format. Analyzing normally only happens at the first start or when changes occur. The reload switch can be used to force the analysis and the generation of the ESM output. The artifacts generated in Dev mode are cached and viewable in the browser in ECMAScript format. The cache is another reason why Snowpack works so fast. We can develop and test the changes directly in the browser. When you start the build process via the appropriate script, all artifacts, including dependencies, are packed together and placed in a separate build directory.
In principle, we’ve achieved the same with Snowpack as we did with webpack – but with a few crucial differences: We remain in the future-oriented ESM format that can be directly executed by any browser. Our source code itself is no longer changed and our dependencies are only transferred to the ESM format if they are not already in it. This makes the whole software development not only faster, but simpler and less complicated.
Streaming Imports
Snowpack takes the basic concept of uncompromisingly relying on ESM to the next level. To demonstrate this, let’s bring React into the project, completely abandoning npm and the unloved node_modules directory and using streaming imports instead. To try this out, you should first remove all direct project dependencies from the package.json in the last example. The development dependencies (devDependencies) will stay because we want to continue using Snowpack.
// snowpack.config.js
module.exports = {
  mount: {
    public: { url: "/", static: true },
    src: { url: "/_dist_" }
  },
  packageOptions: {
    source: "remote"
  }
}

// index.jsx
import { camelCase } from 'lodash'
import React from 'react'
import ReactDOM from 'react-dom'

const message = "hello world from react and snowpack"
function HelloWorld() {
  return ( <div> { camelCase(message) } </div> )
}

ReactDOM.render(<HelloWorld />, document.getElementById('app'))
Listing 3 shows the adjustments you need for the Snowpack configuration. The index.js is replaced by index.jsx with a simple React-HelloWorld component that uses the camelCase function from Lodash. Finally, the last line in Listing 3 puts the component in the empty
in index.html. However, the package.json lacks any reference to the dependent libraries. The source=remote setting in the Snowpack configuration is important, as it enables the streaming imports feature we mentioned earlier and builds the bridge to Skypack. Take note that in index.jsx, as we already know from developing with webpack, the imports end in a simple name like lodash, react or react-dom. Internally, Snowpack resolves these simple package names to a Skypack URL. For example, the Lodash import resolves to the URL https://cdn.skypack.dev lodash. Now, if you run the project using
npm run reload
the application will continue to work even though the dependencies are no longer in node_modules. When the build process is triggered, the dependencies are taken into account and placed in the distribution directory. Snowpack automatically detects that you have included React and JSX and can handle the JSX syntax. By the way, besides React, Snowpack also supports the following frameworks: Vue, Svelte, Preact, Sass, WebAssembly, Babel, Jest, and many more.
Conclusion
Hopefully, this article has made you aware of the issue of complexity. The environment of software engineering and modern web applications based on HTML5, CSS, and especially JavaScript is already complicated. It becomes more and more opaque due to a multitude of additional circumstances, some of which have been outlined in this article. It’s our job as developers when we write applications in the enterprise environment to ensure that our projects remain manageable. We should utilize our experience, foresight, focus on what’s necessary. This means using external libraries only when they are really necessary, breaking down complex tool chains and development processes that are difficult to understand, or avoiding them where possible.
I would encourage you to always work with the principle of “keep it simple, stupid” and to rely on standards, like ESM, where possible. Hopefully, this article showed you a way out of a potential complexity pitfall. With Snowpack, you can simplify, streamline and accelerate your JavaScript projects, consistently rely on a standard, and will be a bit more prepared for the future.